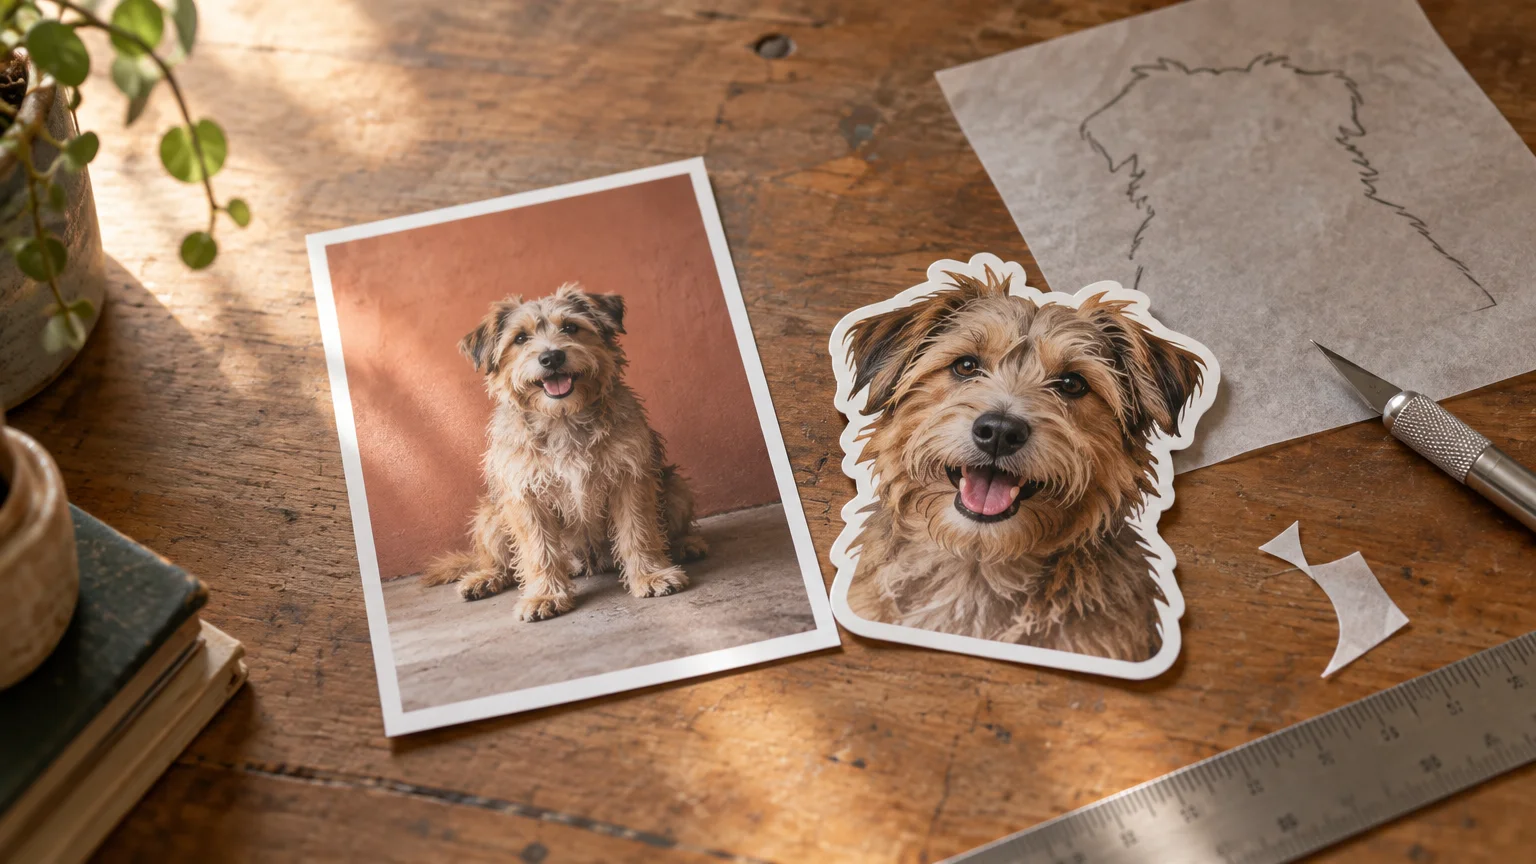
TLDR: Start with the silhouette, not the masking tool. A photograph makes a strong die-cut sticker when its subject remains recognizable at the intended print size, has a clean outer contour and does not depend on a busy background for meaning. Remove the background with a reversible mask, simplify details that will disappear in print, add breathing room around fragile edges and export according to the chosen printer’s current requirements.
The difficult part of trying to turn photo into die cut sticker design is not cutting away the background. It is deciding what the photograph becomes after its rectangle disappears. A portrait may lose the room that gave it atmosphere. A bicycle may become a nest of thin spokes. A dog with windblown fur may acquire an outline so busy that the expression no longer gets noticed.
The best result is not necessarily the most literal extraction. It is the version that preserves the subject’s gesture, expression and photographic character while giving the cut shape enough clarity to work as a small object. Before refining a single hair, reduce the photograph to roughly its intended size and ask: what does the eye recognize first?
Why a good photograph may make a weak sticker
Photographic composition usually happens inside a rectangle. Empty space can suggest distance, a shadow can anchor the subject and a bright background can separate a dark profile. A die-cut sticker changes that relationship: the subject’s outer contour becomes part of the composition.
Look for a subject with a readable pose or profile. A head turned slightly to the side often reads more clearly than a face looking straight into the camera. A camera seen at a three-quarter angle may have a more distinctive outline than the same camera photographed square-on. A compact cluster of flowers is usually easier to cut than a dozen isolated stems.
Make a small preview before doing detailed work. If the subject turns into an uncertain blob, try a tighter crop, stronger tonal separation or a different frame from the sequence. If you are still deciding what the finished object should emphasize, these custom sticker design ideas can help separate a useful visual concept from decoration added merely to fill space.
- Favor a clear overall gesture over many tiny internal details.
- Check whether the face, product or defining feature remains visible at final size.
- Watch for narrow gaps between limbs, handles, straps, branches or other projections.
- Notice whether similarly colored foreground and background areas have contaminated the subject’s edge.
- Reject a frame that only works because its original background explains the action.
Choose the shape before perfecting the mask
Make a rough selection and hide the background. Do not spend half an hour recovering individual hairs yet. First place the isolated subject over plain white, black and a middle gray. These temporary backgrounds reveal pale halos, dark fringes, missing sections and color spill that may remain invisible against Photoshop’s transparency grid.
Keep this work reversible. A layer mask hides pixels without permanently deleting them, so you can restore a shoulder, curl or camera strap when the first automatic selection cuts too deeply. Preserve the untouched original in the document as well. That separation makes it easier to distinguish ordinary production cleanup from an alteration that changes the subject.
Photoshop currently offers Select Subject followed by the Select and Mask workspace, with Refine Hair available for detailed hair selections. Adobe describes Color Aware and Object Aware refinement modes, with Object Aware intended for subjects such as hair, fur and objects against complex backgrounds. The controls and examples are covered in Adobe’s current hair-selection guide. These tools are useful starting points, not a reason to accept every generated edge.
Simplify hair, fur and soft edges intelligently
A photograph can contain thousands of fine edge transitions. A small sticker cannot give each one equal importance. Keep locks of hair or tufts of fur that establish the subject’s shape, but consider suppressing isolated flyaways that would create weak projections or a nervous cutline. The aim is not to turn fur into a helmet. It is to preserve a convincing soft edge within a calmer overall contour.
Glass, smoke, veils, motion blur and translucent fabric need a different decision. Their appearance depends partly on the background showing through them. A transparent object may therefore need a simple supporting shape behind it rather than complete background removal. Smoke may work as printed tonal texture inside a broader contour, but rarely as dozens of individually cut wisps.
Use edge controls with restraint. Adobe distinguishes anti-aliasing, which smooths the color transition along a selection boundary, from feathering, which creates a blurred transition zone. A little edge smoothing can prevent a jagged extraction, but broad feathering can create a pale or muddy halo. Inspect the mask at high magnification to locate problems, then return to the final-size preview to decide whether those problems actually matter.
Be especially careful with documentary photographs, artworks and recognizable people. Removing a background for production is one thing; changing an expression, body contour, object or meaningful context is another. If cleanup changes what the photograph appears to show, it should be treated as an intentional alteration rather than routine edge refinement.
Crop for the cut shape, not the old rectangle
Once the background is gone, ignore the original corners. Rotate or reposition the subject according to its gesture. A running figure may need room in front of the face and knees. A portrait may feel balanced with the shoulders forming a broad base. An old camera might benefit from including its strap if the curve helps hold the silhouette together, but not if the strap becomes a long, vulnerable tail.
Avoid forcing recognizable details directly against the cut edge. Fingers, ears, antennae, flower petals and narrow equipment parts can feel cramped even when they technically fit. A border creates breathing room and lets the contour be simpler than the photographic edge. It can also separate a dark subject from a dark surface where the sticker may eventually be placed.
Think of that border as part of the image rather than an automatic white outline. Its width should appear visually deliberate, and its corners should flow around the subject. Calm tight inward notches and bridge gaps that would otherwise leave frail slivers. If the finished artwork is ready for production, custom die-cut sticker printing is a natural next step, but the selected printer’s own proof and artwork rules should control the final setup.
Test the design at its actual sticker size
A large monitor view is generous to weak decisions. It makes eyelashes, wheel spokes and leaf tips look important because every detail occupies many screen pixels. The sticker will be less forgiving.
Set a duplicate of the design to the intended physical dimensions and evaluate it at a realistic display scale. Because screen scaling and pixel density vary, a 100% software view does not always correspond to physical size on every monitor. Compare an on-screen ruler with a real ruler if you want to calibrate the display, or print a paper proof at 100% scale. The paper proof will not reproduce the final material or color exactly, but it is excellent for judging size and recognition.
- Can you identify the subject immediately at arm’s length?
- Do the eyes, logo, lens or other focal detail remain legible?
- Have narrow gaps closed into accidental dark shapes?
- Does the border look even and intentional rather than swollen in some areas?
- Are any projections so thin that the overall contour feels fragile?
- Does the image still work when placed on both a light and a dark background?
If a detail disappears, decide whether to enlarge it, increase local contrast or remove it. Sharpening may clarify an already captured edge, but it cannot invent a missing expression or restore texture that the original photograph never recorded.
Keep resolution separate from resampling
Resolution describes how image pixels are allocated across a physical print size. Resampling changes the number of pixels in the file. Adobe states that enabling Resample while changing image dimensions adds or removes pixels. Increasing the pixel count can help meet a file specification or reduce visible stair-stepping, but it does not recover genuine photographic detail that was absent from the source.
Work from the largest useful original, finish the crop and mask, and only then prepare an output copy. Avoid repeatedly enlarging and reducing the same working file. For this provider example, StickerApp’s general guidance calls for high-resolution artwork at 300 dpi and at least a 2 mm safety margin. Those numbers belong to StickerApp’s workflow; another printer may specify a different resolution, margin, bleed or cutline method.
Prepare the final file for the chosen printer
Do not treat one company’s production template as a universal sticker standard. Check the exact product page immediately before export, especially if the design has tiny gaps, a complicated contour or specialty material.
For a customer-supplied custom cutline, StickerApp currently specifies a closed vector path, a 1 pt spot-color line named “die cut,” 2 mm of bleed beyond that cutline and a 2 mm safety margin for important design elements. Its support material also says customers can upload an image and describe the desired cut rather than constructing the cutline manually. Choose the route that matches your ability to inspect the contour accurately.
StickerApp lists PDF, PNG, JPEG, SVG, TIF, AI and PSD among its accepted formats, while recommending a CMYK PDF for color and clarity. Transparency is format-dependent: its setup guidance notes that PNG and PDF can retain transparency, whereas JPEG cannot. An accepted format is not automatically the best format for every job, so use the provider’s template and proofing process to confirm transparency, color handling and cutline recognition.
The provider says simple custom shapes may be available at roughly 2–3 cm, but it also notes that practical minimum size varies with material and design detail. That qualification matters. A compact camera silhouette and a portrait surrounded by loose curls may behave very differently at the same dimensions.
A compact photo-to-sticker workflow
- Choose a frame whose subject has a clear pose, profile or object shape.
- Make a rough reversible mask and preview the isolated subject at the intended size.
- Decide which hair, fur, gaps and translucent details still contribute to recognition.
- Refine the mask against light, dark and middle-gray temporary backgrounds.
- Recompose the subject for its new contour rather than preserving the rectangular crop.
- Add a deliberate border or supporting shape where fragile edges need protection.
- Print a paper-size proof and simplify anything that becomes muddy or fussy.
- Prepare an output copy using the selected printer’s current dimensions, color guidance, bleed, safety margin and cutline method.
- Inspect the printer’s proof for unexpected cropping, halos, cut placement and small lost details before approving it.
Let the contour carry the photograph
To turn a photograph into a convincing die-cut sticker, design the cut shape as carefully as the color and expression inside it. Keep the details that identify the subject, simplify those that only create edge noise and judge every choice at the size people will actually see. When in doubt, choose the quieter silhouette. A clean, immediate shape usually preserves more photographic character than a literal outline crowded with details too small to survive.
References
- Refine hair selections in Photoshop | Photoshop
- Refine selection edges in Photoshop | Photoshop
- Resize images with Resample in Photoshop | Photoshop
- How to create a sticker?
- How to make your own cutlines?
- How do I set up my file for custom stickers?
- What file types do we accept?
- File Setup for Sticker Sheets
- Can the stickers be cut into custom shapes and sizes?