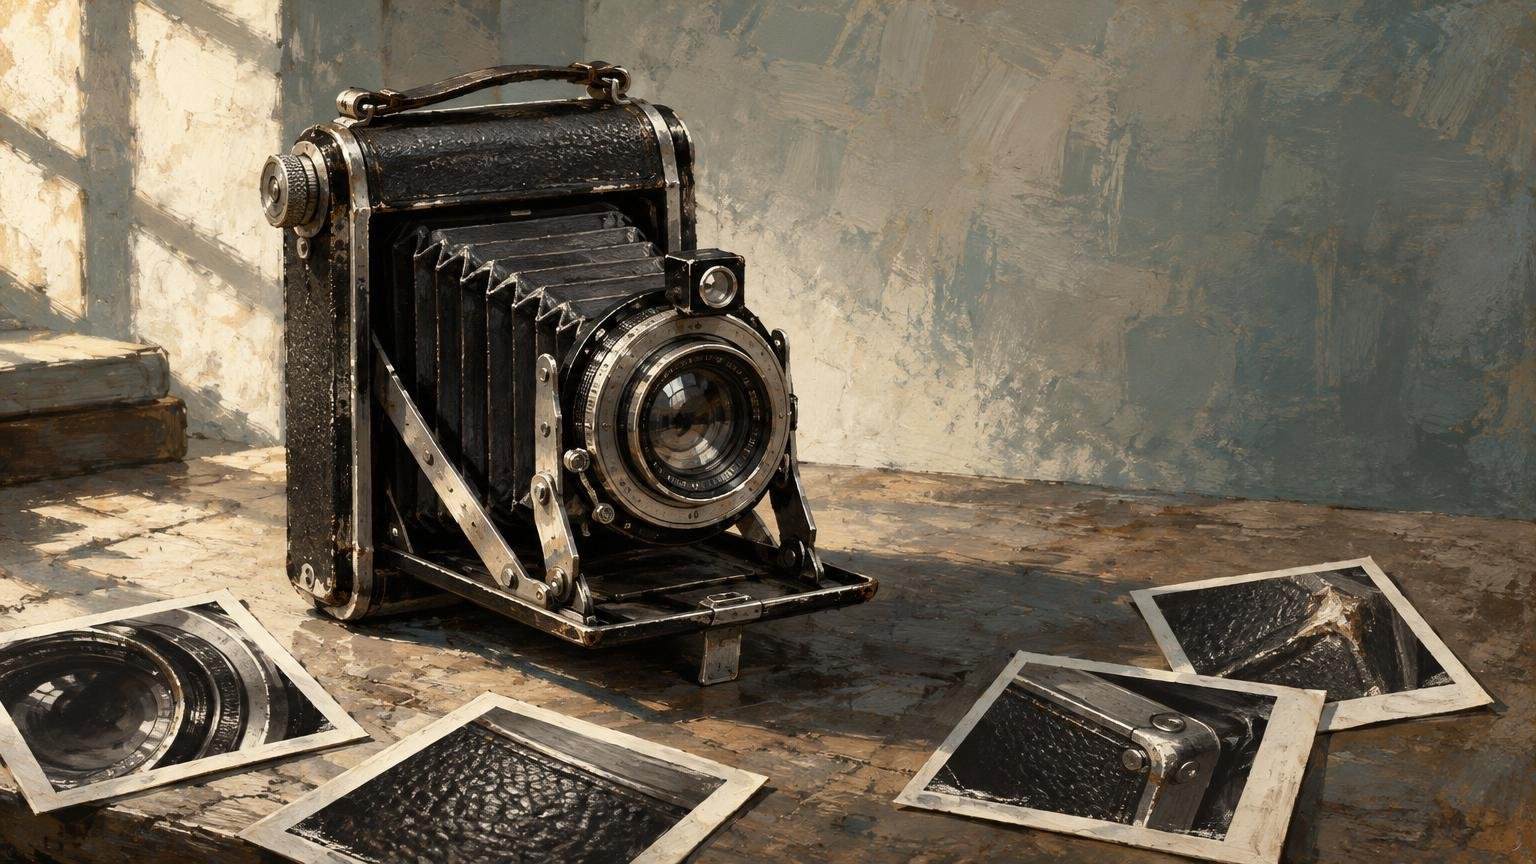
Author: Blake Leslie

  • How to Photograph a Vintage Camera for an Online Listing

    How to Photograph a Vintage Camera for an Online Listing

    TLDR: When learning how to photograph a vintage camera for an online listing, treat the session as both product photography and visual inspection. Make the first frame attractive, then use the remaining photographs to identify the exact camera, show every side, reveal visible defects, document included accessories, and clarify what was or was not tested. Soft light makes the camera readable; selective side lighting makes wear readable.

    A polished hero photograph may earn the click, but buyers make decisions from the less glamorous frames: the scratched baseplate, cloudy lens, clean battery compartment, worn bellows corner, or serial number tucked beneath a rewind knob. The best listing sequence lets a buyer admire the object and inspect it without pretending that photographs can prove mechanical reliability.

    Prepare the camera without erasing its history

    Begin on a stable table covered with a clean, soft, neutral material. Remove straps or loose accessories if they could pull the camera off balance, then photograph them separately. Support folding cameras and unusual body shapes so they cannot roll, tip, or place strain on an old hinge. Preventive-conservation guidance from the Canadian Conservation Institute emphasizes secure support and minimizing handling risks around potentially fragile objects. Its collection-care guidance is useful when the camera has brittle leather, loose trim, corrosion, or uncertain structural condition.

    Limit preparation to gentle, non-invasive dust removal. A clean blower and a soft exterior brush may be appropriate when used cautiously, but do not polish away patina, scrub corrosion, apply dressing to leatherette, or dismantle the camera for the sake of a photograph. Cleaning can alter the condition you are supposed to document, and loose particles can scratch glass or painted surfaces.

    If a control resists, stop. Do not force a film door, shutter, focusing rail, battery cover, or folding mechanism merely to complete a shot list. Photograph the obstruction and describe it. An incomplete but truthful view is better than fresh damage caused by an enthusiastic inspection.

    Build the lighting around metal, glass, and texture

    Place the camera against a plain background that separates it from the body. Mid-gray often works well for a camera containing both black leatherette and bright chrome. White can make dark edges easy to see but may disappear in polished metal; black looks dramatic but can hide grime, missing paint, and dark accessories.

    Use one large, diffused light source above and slightly to one side, then place white card opposite it to soften deep shadows. A window through a sheer curtain can work, as can a lamp through proper photographic diffusion. Avoid mixing daylight with warm household lamps because the chrome may turn blue while the covering turns orange. Set a custom or fixed white balance rather than allowing automatic white balance to wander between frames.

    Reflective metal does not merely reflect the lamp; it reflects the room. Move white and black cards around the camera until the chrome shows long, controlled tonal bands instead of tiny burned-out spots. The white cards create clean highlights, while a narrow black card can define the edge of a silver control. Keep yourself, the phone, and bright windows out of direct reflections where possible.

    Do not make every frame equally soft. Broad light is flattering for the opening view, but low side light—often called raking light—can reveal dents, scratches, lifted covering, engraved lettering, and uneven corrosion. Make a second exposure under that more revealing light when a defect disappears in the attractive setup. The goal is not to make the camera look worse; it is to keep soft light from accidentally hiding its surface.

    How to photograph a vintage camera for an online listing: the essential sequence

    Start with a three-quarter front view showing the body, lens, major controls, and overall silhouette. Keep the camera level, leave a little breathing room around it, and avoid the wide-angle distortion produced by placing a phone extremely close. Step back and use a moderate focal length or modest optical zoom when image quality allows.

    Then work methodically around the object. A repeatable sequence reduces the chance that a damaged corner or missing accessory will be forgotten.

    1. Three-quarter front hero view with the complete camera visible.
    2. Straight front view showing the lens mount, lens face, finder windows, and front controls.
    3. Back view, including the film door, viewing screen, eyepiece, or rear standard.
    4. Left and right sides, with strap lugs, ports, hinges, and focusing controls visible.
    5. Top view showing dials, hot or cold shoe, shutter release, rewind controls, and meter display.
    6. Bottom view showing the baseplate, tripod socket, release controls, labels, and wear.
    7. Lens markings and front glass, followed by rear glass if it can be shown without unsafe disassembly.
    8. Model, maker, serial number, and other identifying marks.
    9. Open film chamber or plate holder area when it opens normally and can be supported safely.
    10. Every included case, cap, hood, strap, spool, adapter, manual, and detachable accessory.

    The US National Archives and Records Administration describes a controlled, documentation-oriented approach to photographing objects. Its Digital Photography for Object Documentation guide is a useful reference for consistent capture rather than improvising each frame. Consistency matters because buyers should be able to compare one side with another without mentally correcting dramatic shifts in angle, exposure, or color.

    Add views specific to the camera type

    A generic exterior sequence is not enough for every design. For a 35mm or medium-format camera, show the open film chamber, pressure plate, take-up area, and film rails when accessible. Photograph a cloth or metal shutter curtain only in a position reached through normal, gentle operation. Do not touch the curtain or repeatedly cycle an uncertain mechanism for the photograph.

    For a folding camera, photograph the bellows fully extended as well as folded. Show every corner and seam from several angles. Place a light outside the bellows and photograph from the darker interior only if the camera can be held securely and the procedure does not require forcing anything. A bright point may indicate a pinhole, but a photograph alone may not reveal every leak.

    For an electronic camera, show the battery compartment and contacts. Do not insert a battery when the correct type, voltage, polarity, or state of the electronics is uncertain. Existing corrosion, residue, broken contacts, and missing covers deserve their own sharp frames.

    Interchangeable-lens cameras also benefit from a body-cap-off view of the mount and accessible interior, but only in a clean environment and for the shortest practical time. Keep dust control ahead of photographic completeness.

    Photograph flaws as located evidence

    A close-up without context can be surprisingly unhelpful. Pair each significant defect with two images: a wider frame showing where it is and a closer frame showing its character. This is especially useful for dents, cracks, scratches, corrosion, missing covering, damaged filter threads, residue, bellows wear, and non-original parts.

    For small markings, stabilize both the camera and capture device. Use a tripod, copy stand, or improvised phone support, focus on the lettering, and move the light until the engraving separates from the surrounding metal. Keep enough of the nearby control or panel in view to establish the marking’s location. Review the image at full size before moving on; a serial number that looks sharp on a phone screen may be unreadable after upload compression.

    Lens defects require more than one lighting angle. Photograph the exterior and normal frontal appearance first. Then use an off-axis light to reveal scratches or internal haze, without presenting flare from the lamp as a defect. Branching marks may be described as “fungus-like” unless they have been competently identified. Likewise, show possible separation, coating marks, dust, or haze clearly without diagnosing what a photograph cannot establish.

    Include a ruler only when physical scale is ambiguous, such as a dent, crack, detached part, or unusual accessory. Place it beside the object rather than across a delicate surface. A gray card can help establish neutral color and exposure, but it need not appear in the public listing unless color accuracy is unusually important. Keep a reference frame in the original image set.

    Edit for clarity, not cosmetic repair

    Appropriate adjustments include exposure correction, neutral white balance, a consistent crop, gentle contrast, modest lens-distortion correction, and careful sharpening. Apply them consistently enough that black covering does not change from charcoal to deep blue between views. Retain the untouched originals in case a buyer asks for another crop or questions a detail.

    Do not clone out dust, scratches, corrosion, chipped paint, stains, or background elements that overlap the camera. Avoid aggressive noise reduction that smears engraving and texture. Heavy clarity, saturation, artificial blur, or composited reflections can change how the surface appears. Sensor noise is a capture artifact; added grain is a stylistic effect. Neither should be confused with genuine texture on the camera, and decorative grain has no useful role in condition photographs.

    Separate appearance from operation

    Photographs can establish visible condition, identity, completeness, and some evidence of care. They cannot prove that shutter speeds are accurate, a meter is calibrated, focus is correct, bellows are fully light-tight, or the camera produces properly exposed film.

    Describe testing in layers: what was visually observed, what action was attempted, what happened, and what remains untested. “Shutter released at several settings, but speeds were not measured” is more useful than “works.” “Finder image is visible; focus accuracy was not tested on film” also draws an honest boundary.

    If you plan to make functional claims, use a separate inspection process rather than inferring operation from attractive images. This guide to testing a vintage film camera before buying explains why clean glass, intact covering, and a moving shutter do not establish complete working condition.

    Check the marketplace rules before publishing

    Use photographs of the actual camera, not a cleaner example of the same model. Etsy’s listing-image requirements emphasize original images and accurate representation of an item’s condition, quality, and quantity. For a one-of-one vintage object, actual-item photographs also prevent uncertainty about which scratches, lens, case, or serial number the buyer will receive.

    Rules vary by marketplace and can change. At the time represented by the supplied policy, eBay required listing images to represent the item accurately, prohibited additions such as watermarks, added text, borders, and marketing material, and required at least one image measuring 500 pixels on its longest side. Check the current policy immediately before uploading rather than treating those conditions as universal. Also verify the platform’s photo limit, preferred dimensions, accepted file types, cropping behavior, and restrictions on stock imagery or overlays.

    Finish with a buyer’s-eye review

    Before publishing, view the sequence on a phone and ask whether a cautious buyer can answer four questions: Is this the exact camera being sold? What is included? Where are the visible flaws? What has actually been tested?

    If one answer is unclear, make another photograph rather than asking the description to carry all the weight. Lead with the frame that makes the camera desirable, but let the rest make it understandable. Old cameras have earned their marks. Good listing photography does not polish that history away; it gives each mark enough light to speak plainly.
    References

    1. Preventive conservation guidelines for collections – Canada.ca
    2. Digital Photography for Object Documentation
    3. Listing Image Requirements – Our House Rules | Etsy
    4. Picture policy | eBay

  • How to Store Negatives Before Scanning So Dust and Scratches Stay Manageable

    How to Store Negatives Before Scanning So Dust and Scratches Stay Manageable

    TLDR: The shorthand question “store negatives before scanning dust scratches” comes down to prevention: handle film by its edges, place it in suitable photographic enclosures, support it flat, label the enclosure and remove only a few strips at a time for scanning. Store the archive in a clean, cool, dry and stable interior space. If film is sticky, mouldy, flaking, badly warped or smells like vinegar, stop before cleaning or re-sleeving it.

    A good scan should reveal the photograph: the pale detail in a cloud, the texture of a coat, the expression that almost disappeared between frames. It should not become a long retouching exercise devoted to fingerprints, embedded dust and fresh scratches. Storage cannot reverse damage already present, but careful handling can keep you from adding another layer of defects before the negative reaches the scanner.

    Handle every negative as though both sides matter

    Do not press a finger against either face while trying to determine which side carries the emulsion. Pick up a strip by its edges and avoid dragging it across a table, scanner bed or neighboring strip. The Library of Congress recommends avoiding contact with the film face, using clean nitrile gloves to prevent fingerprints and keeping film away from food, drink and dust. Its guidance also cautions that cotton fibers can be abrasive. Library of Congress film-care guidance

    Fresh, well-fitted nitrile gloves are useful when handling unsleeved film, particularly during a sorting session involving many strips. Loose gloves can reduce control, however, so the important point is deliberate edge handling. Keep the work surface clean and dry, move one strip at a time and never pinch the image area. The Canadian Conservation Institute likewise recommends picking unsleeved negatives up by their edges while wearing lint-free gloves.

    • Clear food, drinks, pens, tape and loose tools from the work area.
    • Clean and dry the surface before opening an archive box.
    • Prepare the destination sleeve and its label before removing the film.
    • Hold one strip by its edges without flexing it.
    • Return the strip to an enclosure as soon as the task is complete.

    Choose sleeves made for photographic materials

    The word “archival” on a packet is not a complete specification. For plastic film negatives, established conservation guidance identifies uncoated polyethylene and polyester as suitable enclosure materials; acid-free paper envelopes can also be appropriate in relevant storage arrangements. The Canadian Conservation Institute advises looking for enclosure materials that pass the Photographic Activity Test, or PAT, under ISO 18916:2007.

    PAT testing is more useful than relying on a broad claim such as “acid-free,” particularly for a transparent plastic sleeve. Buy an enclosure intended for photographic collections and confirm its material rather than using an office document wallet of unknown composition. Avoid adhesive tape, rubber bands, sticky notes touching the film and sleeves with coatings or plasticizers that are not identified for photographic use.

    Choose pockets that fit the format and strip length without forcing the negative into a tight channel. A sleeve should prevent loose movement while still allowing the strip to enter and leave without scraping. If film repeatedly catches at the opening, replace the enclosure rather than pushing harder. The archive should feel pleasantly uneventful: no tight bends, sharp clips or mysterious adhesive residue.

    Store strips flat, supported and easy to retrieve

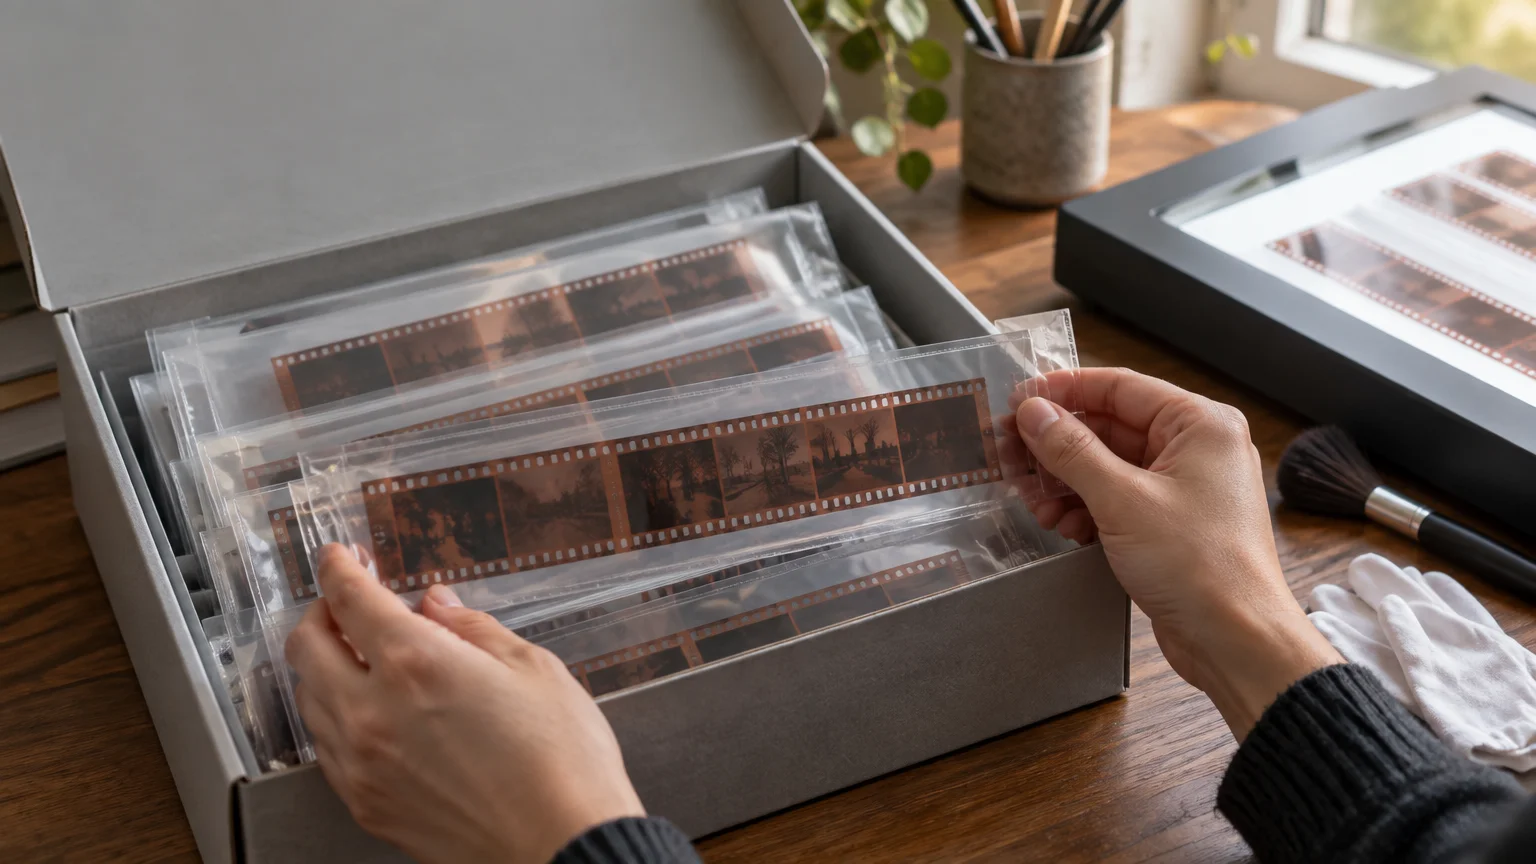
    Sleeved strips need a second layer of physical support. Place pages in a properly supported binder or use sleeves and envelopes inside a protective photographic storage box. Do not overfill either system. Crowded pages encourage bending, while loosely piled strips slide against one another whenever the box is moved.

    Keep the orientation consistent and assign each roll a clear position. For example, place strips in frame order, give the roll a unique identifier and record that identifier on the page or envelope. This makes retrieval faster and reduces the temptation to pull out half the archive to find one photograph.

    Some old film will not lie perfectly flat. Do not try to correct a curl by folding the strip backward, pressing it beneath a heavy object or cramming it into an undersized sleeve. Gentle support is preferable to forced flattening. A compatible scanner holder can position ordinary film during digitization; Epson, for example, instructs users of relevant scanners to hold film by its edges and place it in the holder or film guide designed for that model.

    Control the room as well as the enclosure

    A fine sleeve cannot compensate for a damp basement, hot attic or dusty shelf beside a vent. Photographic materials benefit from a relatively dry, cool, clean and stable environment. The Library of Congress advises avoiding attics, basements, exterior walls, radiators, vents, leaks and places subject to large environmental changes. Protective folders and sleeves reduce exposure to dust, light and handling, but they remain part of a larger storage system.

    An interior cupboard in a regularly occupied part of the home is generally a better starting point than a garage or shed. Keep boxes off the floor and away from plumbing. Stability matters: repeated changes in heat and moisture can be more troublesome than a modest but steady domestic environment.

    Do not apply one universal temperature or humidity target to every photographic object. Cellulose nitrate, cellulose acetate, polyester film and glass plates do not all have identical storage needs. Cold storage also requires suitable packaging and acclimatization procedures; it is not simply a matter of putting negatives in a household refrigerator.

    Label the enclosure, never the image area

    Record the roll number, approximate date, place, people and film format on the sleeve, page or box—not on the negative. The Canadian Conservation Institute specifically advises against writing on negatives with ballpoint or felt-tip pens.

    Label an empty enclosure before inserting film so pen pressure cannot emboss the strip beneath it. Keep the system simple enough to maintain. A useful entry might read “R024 — Córdoba — family lunch — estimated 1988 — strips 1–6.” If the date is uncertain, say so rather than turning a guess into archive history.

    A matching digital filename makes the later scan easier to identify. Roll R024, strip 03 and frame 18 might become R024-S03-F18.tif. The physical negative remains the original object; the scan is a digital interpretation that can be duplicated, edited and prepared for different outputs.

    Use a small scanning queue

    Repeatedly opening every page creates more opportunities for dust, fingerprints and accidental contact. Instead, prepare a small queue—perhaps the next two or three strips—and keep everything else enclosed.

    1. Choose the roll and create its digital folder before handling the film.
    2. Remove only the next strip and inspect it under gentle, raking light.
    3. Check the scanner holder and surrounding work area for visible debris.
    4. Load the strip by its edges without forcing it into the holder.
    5. Scan, verify the file and return the strip to its labeled enclosure.
    6. Finish the small queue before opening another archive box.

    This sequence also prevents a familiar archival tragedy: several unidentified strips resting beside a scanner after the original order has been forgotten. Work slowly enough that every negative has an obvious route back home.

    Be conservative about cleaning before scanning

    Loose dust can reduce scan quality, but cleaning is not automatically harmless. The Canadian Conservation Institute notes that even low-intervention surface cleaning may mechanically scratch a vulnerable gelatin emulsion, especially when the material has deteriorated.

    Begin with inspection rather than treatment. If the film appears sound and only has a few loose particles, follow conservative instructions appropriate to that film and your scanner setup. Do not improvise with household cleaners, solvents, adhesive rollers, vigorous rubbing or canned-air blasts. A stubborn mark is often safer to address in a duplicate scan than through an uncertain treatment of the only negative.

    Keep contaminated or damaged film out of clean sleeves. Place it in an appropriate separate enclosure while seeking condition-specific advice. Routine plastic re-sleeving may itself be risky when an emulsion is friable or lifting because static can disturb damaged material.

    Know when to stop and seek preservation advice

    Pause the ordinary scanning workflow if a negative is sticky, attached to its sleeve, cracked, flaking, mouldy, water-damaged, severely warped or giving off a vinegar-like smell. Vinegar odor, wrinkling and warping can indicate deterioration in cellulose acetate film. Suspected nitrate film requires particular caution because deteriorated nitrate presents serious fire and toxicity concerns.

    Do not separate stuck layers by force or place visibly unstable film into a scanner holder simply to “get one scan first.” Isolate the affected material from the clean working group without unnecessary handling, keep it away from heat and ignition sources, and consult a photographic conservator or qualified archive. The condition of the object—not the scanning schedule—sets the pace.

    Dust, scratches, grain and resolution are different problems

    Dust is material sitting on or near the film. A scratch is physical damage to a surface or image layer. Grain is part of the film image structure, while scanner noise is introduced by the capture system. Treating all four as generic speckles encourages heavy-handed corrections that can erase genuine texture.

    Infrared or software-assisted dust removal can be useful with compatible film and equipment, but it is not a substitute for careful storage. Epson warns that unnecessary dust-removal or DIGITAL ICE processing can blur or distort a scan, and the cited implementation does not support standard monochrome negative film. Check the current manual for the particular scanner, software and film type before enabling it.

    Resolution deserves the same restraint. Choose a scanning resolution in relation to the intended output, crop and film format. Epson describes scanner resolution as a measure related to enlargement capability rather than an automatic measure of image quality. More sampled pixels cannot recreate detail that the lens, focus, exposure or film never recorded, and an advertised resolution does not guarantee that every nominal pixel contains distinct photographic information.

    Make a clean, conservatively processed master scan before performing scratch repair, grain reduction, sharpening or creative contrast work. Preserve that master alongside edited derivatives. If tomorrow’s restoration goes too far—and sliders occasionally acquire enthusiasm of their own—you can return to the quieter interpretation without rescanning the original.

    Make the archive easier on your future self

    Start with one box rather than reorganizing an entire collection at once. Prepare suitable enclosures, choose a numbering convention and process each roll in order. Separate stable film from items needing specialist assessment. Then scan in small batches and return every strip immediately.

    Before closing the box, perform one last viewing check: are the strips supported without pressure, are the labels readable, and can the next roll be found without touching the others? If so, the storage system is doing its job. The easiest dust and scratch cleanup is the damage that never reaches the negative in the first place.

    References

    1. Care, Handling, and Storage of Motion Picture Film – Collections Care (Preservation, Library of Congress)
    2. Basic care – Photographic materials – Canada.ca
    3. Care of Plastic Film-based Negative Collections – Technical Bulletin 35 – Canada.ca
    4. Placing Film in the Film Area Guide
    5. Care, Handling and Storage of Photographs – Collections Care (Preservation, Library of Congress)
    6. Information Leaflet on the Care, Handling, and Storage of Photographs – Collections Care – Resources |Preservation | Library of Congress
    7. Caring for photographic materials – Preventive conservation guidelines for collections – Canada.ca
    8. User’s Guide – Epson Perfection V600 Photo
    9. Removing Dust and Scratch Marks from Originals Using DIGITAL ICE Technology
    10. faq-00009d0-exp13000xl | SPT_B11B257201 | Epson Expression 13000XL | Expression Series | Scanners | Support | Epson US

  • Turning a Photograph Into a Die-Cut Sticker: Better Subjects, Edges and Crops

    Turning a Photograph Into a Die-Cut Sticker: Better Subjects, Edges and Crops

    TLDR: Start with the silhouette, not the masking tool. A photograph makes a strong die-cut sticker when its subject remains recognizable at the intended print size, has a clean outer contour and does not depend on a busy background for meaning. Remove the background with a reversible mask, simplify details that will disappear in print, add breathing room around fragile edges and export according to the chosen printer’s current requirements.

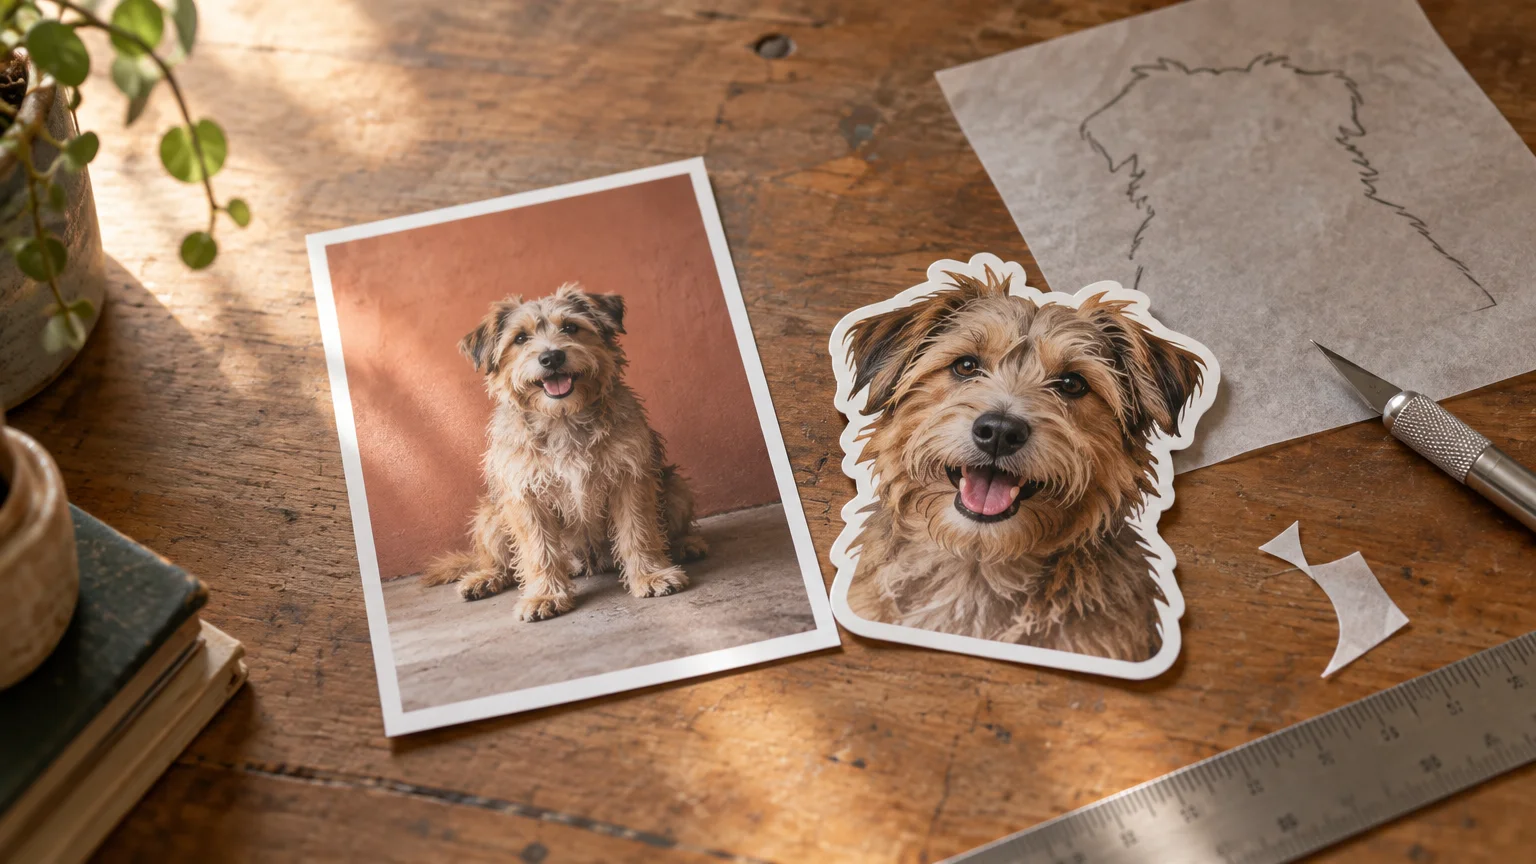
    The difficult part of trying to turn photo into die cut sticker design is not cutting away the background. It is deciding what the photograph becomes after its rectangle disappears. A portrait may lose the room that gave it atmosphere. A bicycle may become a nest of thin spokes. A dog with windblown fur may acquire an outline so busy that the expression no longer gets noticed.

    The best result is not necessarily the most literal extraction. It is the version that preserves the subject’s gesture, expression and photographic character while giving the cut shape enough clarity to work as a small object. Before refining a single hair, reduce the photograph to roughly its intended size and ask: what does the eye recognize first?

    Why a good photograph may make a weak sticker

    Photographic composition usually happens inside a rectangle. Empty space can suggest distance, a shadow can anchor the subject and a bright background can separate a dark profile. A die-cut sticker changes that relationship: the subject’s outer contour becomes part of the composition.

    Look for a subject with a readable pose or profile. A head turned slightly to the side often reads more clearly than a face looking straight into the camera. A camera seen at a three-quarter angle may have a more distinctive outline than the same camera photographed square-on. A compact cluster of flowers is usually easier to cut than a dozen isolated stems.

    Make a small preview before doing detailed work. If the subject turns into an uncertain blob, try a tighter crop, stronger tonal separation or a different frame from the sequence. If you are still deciding what the finished object should emphasize, these custom sticker design ideas can help separate a useful visual concept from decoration added merely to fill space.

    • Favor a clear overall gesture over many tiny internal details.
    • Check whether the face, product or defining feature remains visible at final size.
    • Watch for narrow gaps between limbs, handles, straps, branches or other projections.
    • Notice whether similarly colored foreground and background areas have contaminated the subject’s edge.
    • Reject a frame that only works because its original background explains the action.

    Choose the shape before perfecting the mask

    Make a rough selection and hide the background. Do not spend half an hour recovering individual hairs yet. First place the isolated subject over plain white, black and a middle gray. These temporary backgrounds reveal pale halos, dark fringes, missing sections and color spill that may remain invisible against Photoshop’s transparency grid.

    Keep this work reversible. A layer mask hides pixels without permanently deleting them, so you can restore a shoulder, curl or camera strap when the first automatic selection cuts too deeply. Preserve the untouched original in the document as well. That separation makes it easier to distinguish ordinary production cleanup from an alteration that changes the subject.

    Photoshop currently offers Select Subject followed by the Select and Mask workspace, with Refine Hair available for detailed hair selections. Adobe describes Color Aware and Object Aware refinement modes, with Object Aware intended for subjects such as hair, fur and objects against complex backgrounds. The controls and examples are covered in Adobe’s current hair-selection guide. These tools are useful starting points, not a reason to accept every generated edge.

    Simplify hair, fur and soft edges intelligently

    A photograph can contain thousands of fine edge transitions. A small sticker cannot give each one equal importance. Keep locks of hair or tufts of fur that establish the subject’s shape, but consider suppressing isolated flyaways that would create weak projections or a nervous cutline. The aim is not to turn fur into a helmet. It is to preserve a convincing soft edge within a calmer overall contour.

    Glass, smoke, veils, motion blur and translucent fabric need a different decision. Their appearance depends partly on the background showing through them. A transparent object may therefore need a simple supporting shape behind it rather than complete background removal. Smoke may work as printed tonal texture inside a broader contour, but rarely as dozens of individually cut wisps.

    Use edge controls with restraint. Adobe distinguishes anti-aliasing, which smooths the color transition along a selection boundary, from feathering, which creates a blurred transition zone. A little edge smoothing can prevent a jagged extraction, but broad feathering can create a pale or muddy halo. Inspect the mask at high magnification to locate problems, then return to the final-size preview to decide whether those problems actually matter.

    Be especially careful with documentary photographs, artworks and recognizable people. Removing a background for production is one thing; changing an expression, body contour, object or meaningful context is another. If cleanup changes what the photograph appears to show, it should be treated as an intentional alteration rather than routine edge refinement.

    Crop for the cut shape, not the old rectangle

    Once the background is gone, ignore the original corners. Rotate or reposition the subject according to its gesture. A running figure may need room in front of the face and knees. A portrait may feel balanced with the shoulders forming a broad base. An old camera might benefit from including its strap if the curve helps hold the silhouette together, but not if the strap becomes a long, vulnerable tail.

    Avoid forcing recognizable details directly against the cut edge. Fingers, ears, antennae, flower petals and narrow equipment parts can feel cramped even when they technically fit. A border creates breathing room and lets the contour be simpler than the photographic edge. It can also separate a dark subject from a dark surface where the sticker may eventually be placed.

    Think of that border as part of the image rather than an automatic white outline. Its width should appear visually deliberate, and its corners should flow around the subject. Calm tight inward notches and bridge gaps that would otherwise leave frail slivers. If the finished artwork is ready for production, custom die-cut sticker printing is a natural next step, but the selected printer’s own proof and artwork rules should control the final setup.

    Test the design at its actual sticker size

    A large monitor view is generous to weak decisions. It makes eyelashes, wheel spokes and leaf tips look important because every detail occupies many screen pixels. The sticker will be less forgiving.

    Set a duplicate of the design to the intended physical dimensions and evaluate it at a realistic display scale. Because screen scaling and pixel density vary, a 100% software view does not always correspond to physical size on every monitor. Compare an on-screen ruler with a real ruler if you want to calibrate the display, or print a paper proof at 100% scale. The paper proof will not reproduce the final material or color exactly, but it is excellent for judging size and recognition.

    • Can you identify the subject immediately at arm’s length?
    • Do the eyes, logo, lens or other focal detail remain legible?
    • Have narrow gaps closed into accidental dark shapes?
    • Does the border look even and intentional rather than swollen in some areas?
    • Are any projections so thin that the overall contour feels fragile?
    • Does the image still work when placed on both a light and a dark background?

    If a detail disappears, decide whether to enlarge it, increase local contrast or remove it. Sharpening may clarify an already captured edge, but it cannot invent a missing expression or restore texture that the original photograph never recorded.

    Keep resolution separate from resampling

    Resolution describes how image pixels are allocated across a physical print size. Resampling changes the number of pixels in the file. Adobe states that enabling Resample while changing image dimensions adds or removes pixels. Increasing the pixel count can help meet a file specification or reduce visible stair-stepping, but it does not recover genuine photographic detail that was absent from the source.

    Work from the largest useful original, finish the crop and mask, and only then prepare an output copy. Avoid repeatedly enlarging and reducing the same working file. For this provider example, StickerApp’s general guidance calls for high-resolution artwork at 300 dpi and at least a 2 mm safety margin. Those numbers belong to StickerApp’s workflow; another printer may specify a different resolution, margin, bleed or cutline method.

    Prepare the final file for the chosen printer

    Do not treat one company’s production template as a universal sticker standard. Check the exact product page immediately before export, especially if the design has tiny gaps, a complicated contour or specialty material.

    For a customer-supplied custom cutline, StickerApp currently specifies a closed vector path, a 1 pt spot-color line named “die cut,” 2 mm of bleed beyond that cutline and a 2 mm safety margin for important design elements. Its support material also says customers can upload an image and describe the desired cut rather than constructing the cutline manually. Choose the route that matches your ability to inspect the contour accurately.

    StickerApp lists PDF, PNG, JPEG, SVG, TIF, AI and PSD among its accepted formats, while recommending a CMYK PDF for color and clarity. Transparency is format-dependent: its setup guidance notes that PNG and PDF can retain transparency, whereas JPEG cannot. An accepted format is not automatically the best format for every job, so use the provider’s template and proofing process to confirm transparency, color handling and cutline recognition.

    The provider says simple custom shapes may be available at roughly 2–3 cm, but it also notes that practical minimum size varies with material and design detail. That qualification matters. A compact camera silhouette and a portrait surrounded by loose curls may behave very differently at the same dimensions.

    A compact photo-to-sticker workflow

    1. Choose a frame whose subject has a clear pose, profile or object shape.
    2. Make a rough reversible mask and preview the isolated subject at the intended size.
    3. Decide which hair, fur, gaps and translucent details still contribute to recognition.
    4. Refine the mask against light, dark and middle-gray temporary backgrounds.
    5. Recompose the subject for its new contour rather than preserving the rectangular crop.
    6. Add a deliberate border or supporting shape where fragile edges need protection.
    7. Print a paper-size proof and simplify anything that becomes muddy or fussy.
    8. Prepare an output copy using the selected printer’s current dimensions, color guidance, bleed, safety margin and cutline method.
    9. Inspect the printer’s proof for unexpected cropping, halos, cut placement and small lost details before approving it.

    Let the contour carry the photograph

    To turn a photograph into a convincing die-cut sticker, design the cut shape as carefully as the color and expression inside it. Keep the details that identify the subject, simplify those that only create edge noise and judge every choice at the size people will actually see. When in doubt, choose the quieter silhouette. A clean, immediate shape usually preserves more photographic character than a literal outline crowded with details too small to survive.

    References

    1. Refine hair selections in Photoshop | Photoshop
    2. Refine selection edges in Photoshop | Photoshop
    3. Resize images with Resample in Photoshop | Photoshop
    4. How to create a sticker?
    5. How to make your own cutlines?
    6. How do I set up my file for custom stickers?
    7. What file types do we accept?
    8. File Setup for Sticker Sheets
    9. Can the stickers be cut into custom shapes and sizes?